

In fall of 2013, Cotton + Steel a new brand division of RJR Fabrics launched and it’s been an awesome ride to see what the five designers come up with! Melody Miller the Creative Director, Kim Kight, Rashida Coleman-Hale, Sarah Watts, and Alexia Abegg each have their own line but the best thing about Cotton + Steel is that all of the designers collaborate on the whole collection. They will continue to inspire the sewing community and we are very lucky to have them at the 1st Sewtopia event!
While coordinating details with Melody Miller – she asked us if we could use their selvages from their 1st line. We jumped at the chance and thought, we could ask the attendees of Salt Lake to help us put together a Selvage Block and if we’re lucky to get 60+ blocks we’d have one G R E A T quilt to auction away (on Instagram) and give the 100% of the proceeds to a charity.

The charity of choice is Blood Water Mission. Their mission:
“Blood:Water is an equipping agency that partners with African grassroots organizations to address the HIV/AIDS and water crises. We do this by identifying Africa’s hidden heroes and coming alongside their vision for change. Through technical, financial and organizational support, we expand the reach and effectiveness of African civil society organizations and the communities they serve.”
 Each attendee will received selvages and paper in their swag bags to complete (1) 10.50×10.50 string block. Colleen Molen of The Busy Bean did a great tutorial on a Diagonal Selvage Block.
To start, gather up your selvages. When I cut my selvages off the fabric, I do it before I start cutting the little strips I may be using so I get one big usable piece. I cut just 1″ off the edge, so I don’t feel like I’m wasting fabric, but I still have a usable piece.
There are a few methods to doing a selvages block. I have a tutorial for using fusible interfacing, which is really nice if you’re making a pillow. But if you’re making a quilt, the interfacing can make it really heavy. Not a bad thing if you’re looking for a winter quilt, but doing it with foundation paper will make a much lighter top.
Cut a 10.5” square of paper. I like using the rolls from IKEA when I’m doing anything bigger than a standard sheet of copy paper. (one sheet of paper for the block will be provided at the event)
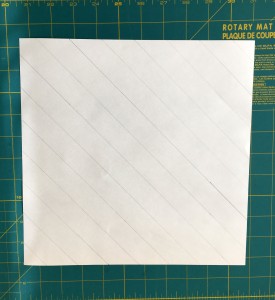
Draw some orientation lines on your paper, from corner to corner, about 1” apart. You won’t be sewing on these lines, they’ll just help you keep your strips lined up. You can skip this if you’re really good at keeping things straight. Or you can draw lines on just one square and keep that underneath the one you’re working on at the moment.
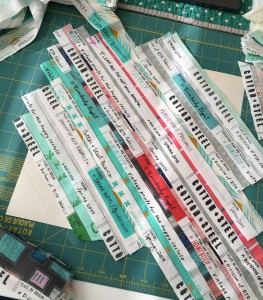
If you want to be particular about what’s next to what, grab your selvedges and start laying them out, starting in one corner and working your way across. Make sure they extend just a little over the edges of your square. Overlap the edges by at least ¼” as you go.
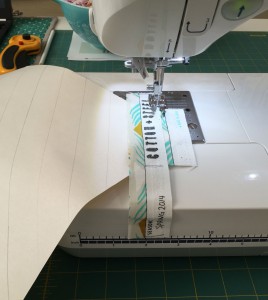
Once you’re happy with the way it looks, move over to your sewing machine. Grab your first corner strip, then lay the 2nd strip on it, overlapping ¼” and start sewing. Stitch along the edge of each selvedge, about 1/8″ or less away from the edge. The selvedges won’t unravel on this side, so you can get right up there and not worry about fraying.
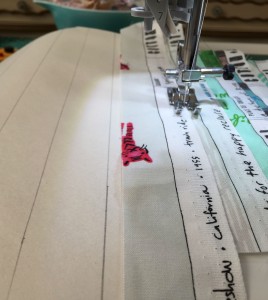
Keep going this way, just stitching the next selvedge on, making sure to check against your orientation lines to keep them straight. Continue until your square is completely covered.
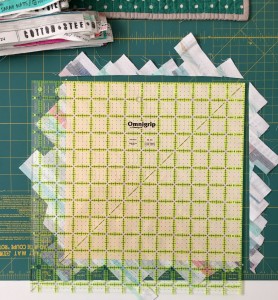
Flip it over and trim your block back to 10.5” square.

At this point, you can remove your paper, or keep it on until you’ve sewn the blocks together and remove them all at once. Continue making blocks until you have enough for whatever size quilt you’re making.